🎉 Celebrating 25 Years of GameDev.net! 🎉

Not many can claim 25 years on the Internet! Join us in celebrating this milestone. Learn more about our history, and thank you for being a part of our community!

Best way to composite images with alpha (AKA Photoshop Normal Blend)

Started by
4 comments, last by JoeJ 1 year, 8 months ago

This may seem like a trivial question, but let's say I have 2 textures with alpha, and want to combine them into one image. I want to essentially emulate Photoshop's Normal blend mode.

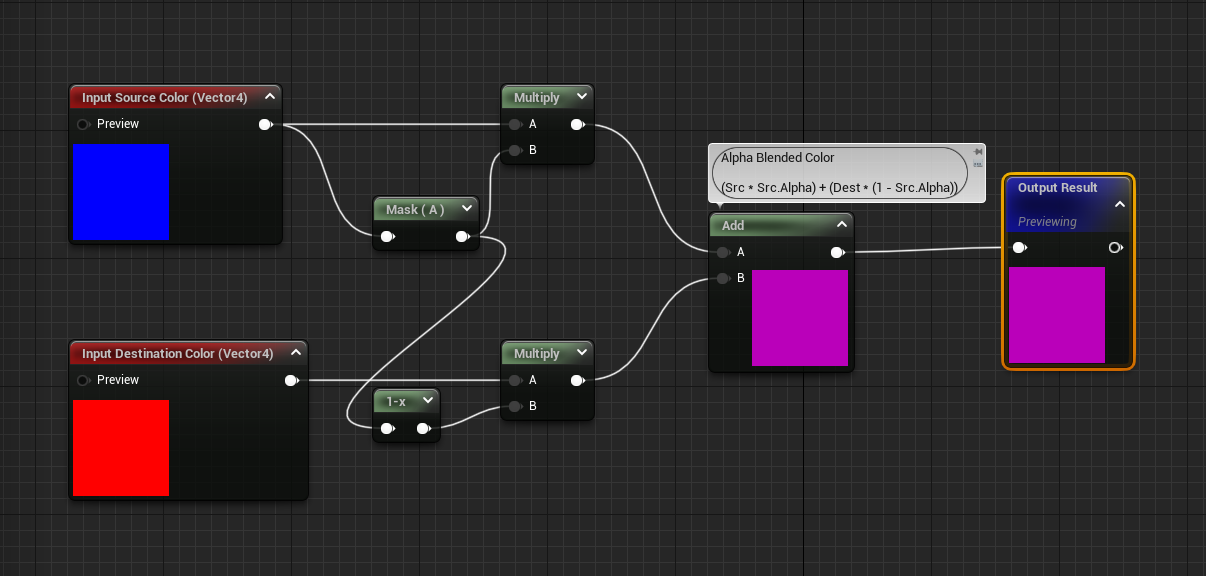
My first instinct is to alpha blend them over a buffer cleared to RGBA 0, 0, 0, 0.

However what actually happens is the result image is darker due to being blended on top of black pixels.

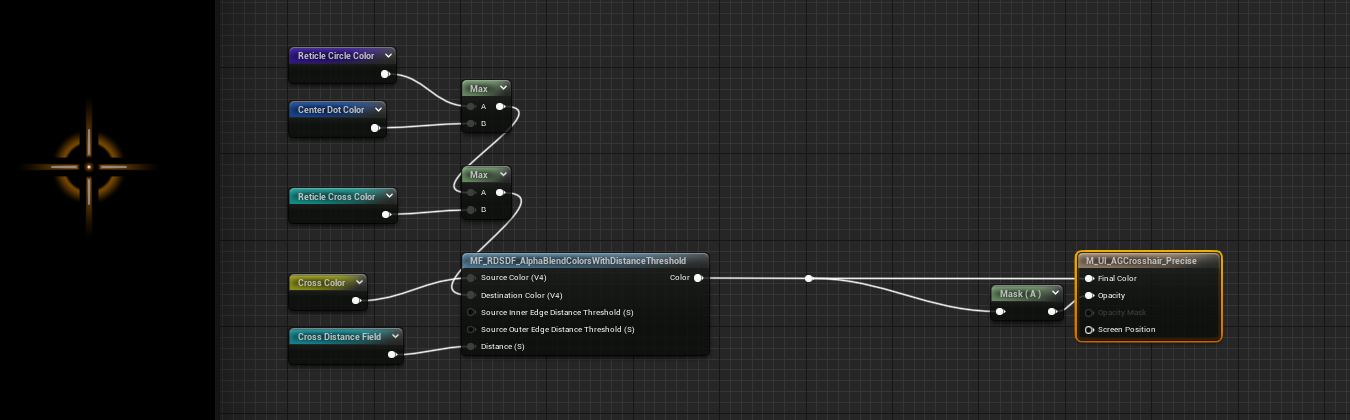
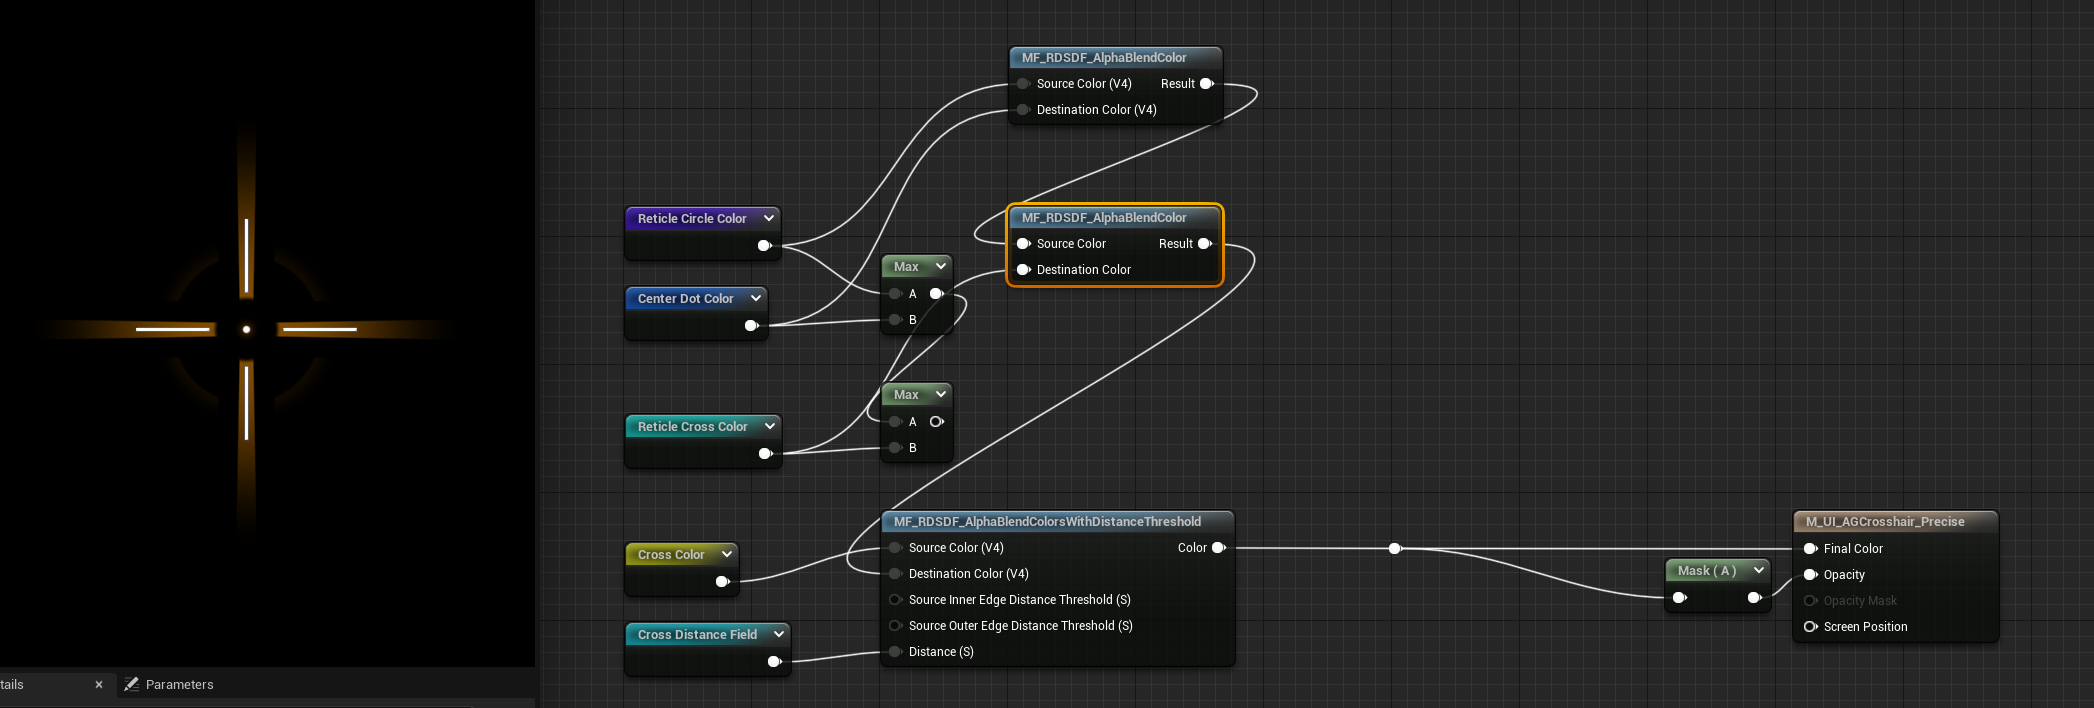
I ended up combining the colors with max() which luckily works in this situation due to the pixels not overlapping.

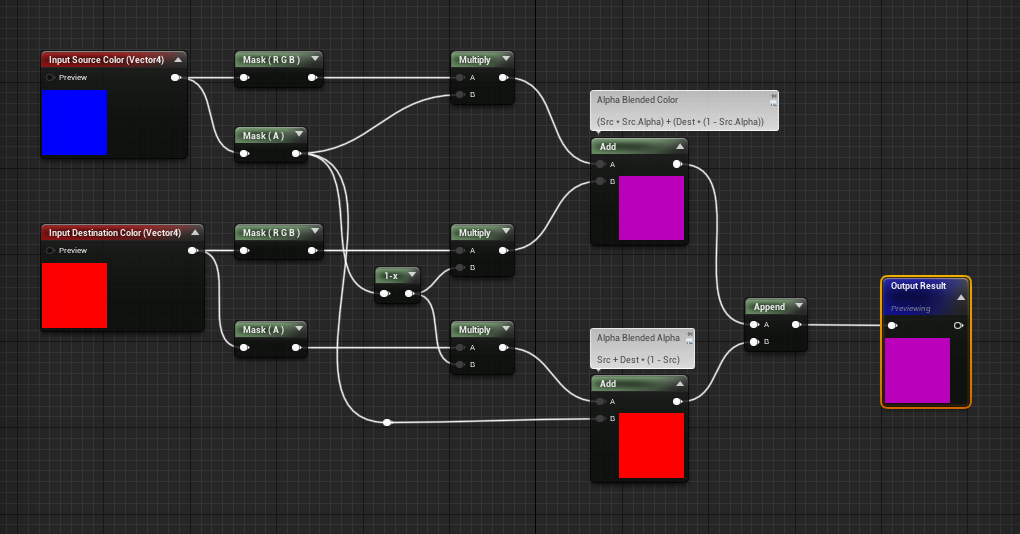
It seems like the correct thing to do is check if the pixels are empty at RGBA 0, 0, 0, 0. So if pixels are drawing over an empty pixel, explicitly take the color. However if the pixel wasn't empty, there'd be a standard alpha blend.

This seems hacky to me for some reason, since I'm doing this inside a shader and would have to essentially have a condition. And even then, my instincts tell me something won't be quite right when alpha blending a pixel over a non empty pixel that also is transparent.

Advertisement

ill said:
However what actually happens is the result image is darker due to being blended on top of black pixels.

Maybe the reason is your image has too low alpha values (below 1 even where it's meant to be opaque)?
After fixing this, no hacks should be needed.

Well, actually I intentionally have parts of the image with alpha. It's an Unreal Material/Shader that produces a final image based on passed in color values. The colors may have alpha, and in fact fade to alpha. The orange could easily be configured to some other color like transparent green, and it still needs to output correctly. #00FF0011 The white crosshair could easily be passed in as some other arbitrary color too.

A crosshair.

This is procedurally generated using a bunch of signed distance fields and math so I don't have the option to make it a texture. Under the hood, it's essentially like compositing a bunch of RGBA textures into one final texture. When I have each pixel take the max value it of course comes out looking perfectly, but this would go terribly wrong if the pixels in my “images” overlapped.

The final compositing step in my material.

Here the “layers” are alpha blended and come out pretty wrong.
Alpha Blend Function


On second though, is it possible my alpha blend function is incorrect? Is the output alpha also supposed to multiply by itself, and the destination alpha by 1 - srcAlpha?


I just read this article and it seems like the alpha is actually supposed to be calculated with a different formula. Something I've never thought about before. https://ciechanow.ski/alpha-compositing/
If an object D has transparency DT and object S has transparency ST, then the resulting transparency RT of those two objects combined is equal to their product:

RT = DT × ST

However, transparency is just one minus alpha, so a substitution gets us:

1 − RA = (1 − DA) × (1 − SA)

Which expands to:

1 − RA = 1 − DA − SA + DA × SA

And simplifies to:

RA = DA + SA − DA × SA

This can be further minimized to one of the two equivalent forms:

RA = SA + DA × (1 − SA)

RA = DA + SA × (1 − DA)

OK, that was the problem. My alpha blend function incorrectly combined the alphas and now my image looks correct.

To summarize,
RGB = (src.RGB * src.A) + (dest.RGB * (1 - src.A))
A = src.A + dest.A * (1 - src.A)

I had incorrect results because I was doing:
RGBA = (src.RGBA * src.A) + (dest.RGBA * (1 - src.A))

Correct Alpha Blend

ill said:
However, transparency is just one minus alpha,

That's usually my source of confusion, because conventions differ. Sometimes alpha = opacity, but sometimes alpha = transparency. Varies between application or people.

Glad you made it work.

This topic is closed to new replies.

Advertisement